Building a Vertical Prop Set-up: Get Set-up to Sow Seed
Starting garden seed indoors can be as simple as sowing into a starter mix and placing your starts in a sunny window. This is a great way to start your spring crop! The best plants to start include the brassicas (arugula, broccoli, Brussels sprouts, cabbage, kale), spinach, and alliums (garlic chives, onions). However, your warm weather or summer crops (tomatoes, eggplant and peppers) require a bit more TLC to get them started. Although your spring veg crops can take it cool (soil temps of 40 F), the summer veggies want it warmer (60-70F). In this issue, we’ll talk about the how of a vertical propagation set-up.
There are three basic elements to setting up a prop area. These are:
- Location, location, location
- Potting station
- Growing area
Location, Location, Location
The very first decision is where to set-up? Even working with a soilless mix, things can get messy. The place needs to have some basics to get plants started. These are:
- A place you can make a bit of a mess without getting into too much trouble
- Temperature control
- Access to water
- Light
In my build, I decided to set up in the cellar. Our home is built on sloping land, so we were able to get three windows installed which let in natural light. The cellar has a concrete floor, so working with potting mixes won’t be an issue (more on mixes later). The cellar is cooler than the rest of the house, so to track temperature changes, I installed a max-min thermometer.
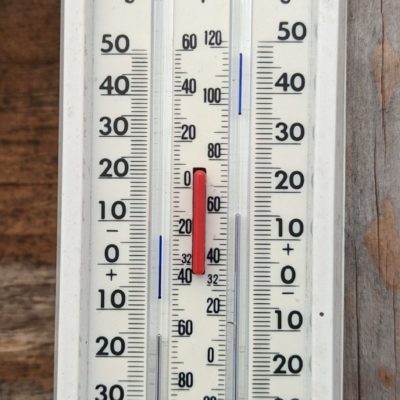
Temperature: Some Plants Just Love Heat!
The daytime-nighttime temps are perfectly cool. They are ideal for spring veg starts. However, the summer crop needs warmer soil temps. For fussy seed, I installed bottom heat. You can purchase a heat mat that sits under your starts to get them into the proper temperature zone to break dormancy (no need to warm the entire space). Place insulating material (rigid insulation board) under the mat, and plug it in.
Water, You Know
Having a ready source of water is well, a bit obvious if you plan to grow plants. If you are using city water that is heavily chlorinated, fill a watering can, and let stand 24-hours before watering in your seeds or seedlings to allow the chlorine to dissipate. However, what will become obvious once you’ve watered (if it isn’t already) is that water is subject to the pull of gravity. That is, it will drain out of the seed tray or peat pot that you just watered. Therefore, when you set up your grow area, plan on using a shallow tray to catch the excess water. Retaining the drained water has several advantages to growing young plants. Among these are:
- The excess water is wicked into the seed tray to prevent drying out too quickly
- Evaporation increases the humidity around the seed tray
- The water in the tray (or lack of it) is a helpful indicator of when you ought to reapply water
Avoid using deep trays to catch water. Too much sitting water will encourage root rot diseases (phytophthora, pythium, fusarium), a certain death sentence for seedlings!
For starting seed, a watering can with a breaker comes in handy.
Light Exposure
Some seed need light to germinate such as lettuce, brassicas, and alliums, plants with tiny seed. Most seeds though, don’t need light to germinate, only to grow. In general, when planting seed, you want to bury the seed the depth of the seed diameter; so larger seed gets planted deeper into the mix, and very small seed gets placed on the soil surface. In shallowly planted seeds, you especially want to consider some sort of humidity control, whether a plate of glass, clear plastic bag or plastic wrap.
The Vertical Propagation Set-up
Why vertical? In short, to save space. Building a shelving unit with two or three levels is ideal. Having at least two bench levels will allow you to optimize the environmental conditions needed by your crop. For example, the upper level is configured with bottom heat for the summer starts; the lower level, without bottom heat for your early spring starts. The size depends greatly on how much planting you intend. The set-up can be as simple or complex as you wish. Wire shelving is ideal for this purpose. It comes in various dimensions, and are easily assembled. Some have wheels to make them mobile.
I decided to use 2×4’s and vinyl coated mesh for the build, although you may also use hardware cloth for bench material.
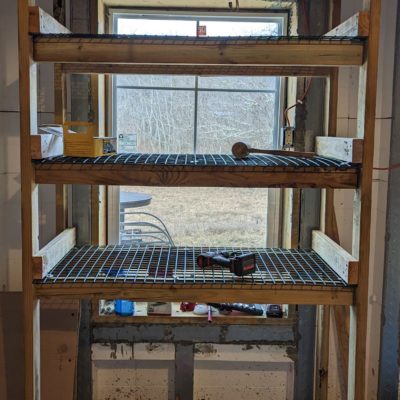
The dimension of each bench or shelf is 2’ x 4’. I installed shop LEDs for lighting. Each shop light is 48” long. These are relatively inexpensive and are adjustable (they hang on chains). The LEDs are plugged into a timer to set the exposure hours.
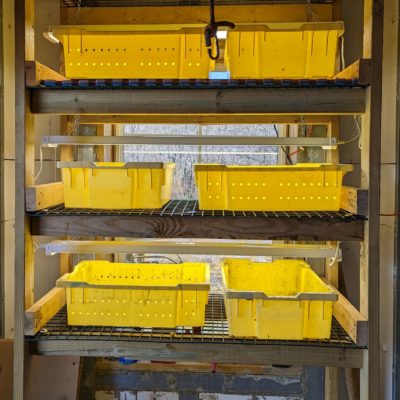
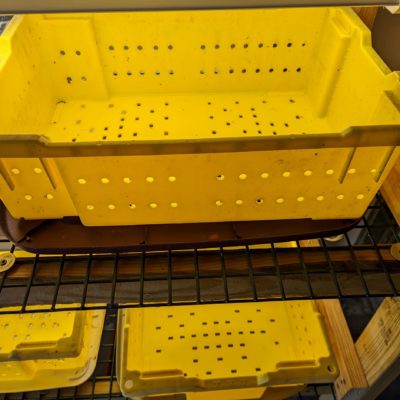
Each bench is wide enough to accommodate two plastic lugs that I use in the vineyard. Each is set on a “tray” (the tops of plastic storage bins…don’t tell my wife!) to catch irrigation water.
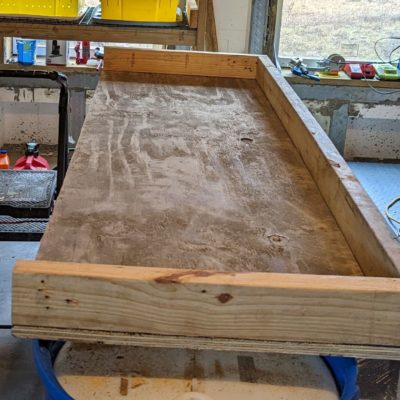
The second part of the build is simpler yet. On two plastic barrels, I set a 2’x6’ piece of plywood with back and side boards made of 2×4’s to serve as a potting bench. Of course, you can make your potting bench with higher with sides and back, but for me, this works.
In the next installment, we’ll consider potting mixes and starting seed!
– Signing off for now, Joe
